
Scheduling a class
Scheduling a class in Embodia requires your clinic manager to grant you the relevant permission first. If the option is not visible, confirm with your clinic manager that class scheduling has been enabled for your account.
How to schedule a class
Navigate to Consults in the top navigation bar and select My classes. This page lists all your upcoming, completed, and classes, along with the option to view classes using a calendar view. Click New class at the bottom of the page to schedule a new class.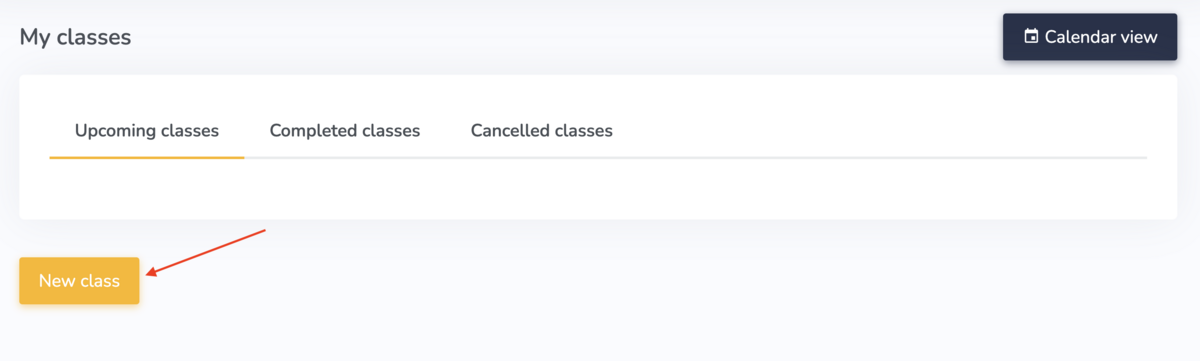
The form is structured similarly to a standard one-on-one consult, with several additional fields specific to group class scheduling.
- Title: give the class a clear, descriptive name
- Service: select the applicable service; a dedicated service type for classes is recommended. Certain information on the class set up page will automatically populate based on the service selected. You can edit if needed. This includes the following fields:
- Duration: length of the class
- Reset time: buffer period following the class
- Consent form: Attach a form if needed. Learn more about consent forms here.
- Consult email: Assign custom emails for this service. Learn more about consult emails here.
- Settings: Apply pre-configured settings for this type of consult. Learn more about consults settings here.
- Questionnaire group: attach multiple questionnaires. Learn more about questionnaire groups here.
- Other practitioners: if multiple practitioners are co-facilitating the class, add them here. Their bio and headshot will display on the class page if their online booking profile is configured.
- Show patients that the consult is scheduled by the clinic: use this if you want the class to appear as a clinic offering rather than attributed to an individual practitioner.
- Recurring class: check this box if you want to create a recurring class. Additional options will then appear. Embodia will check for conflicts in your schedule when using this feature.
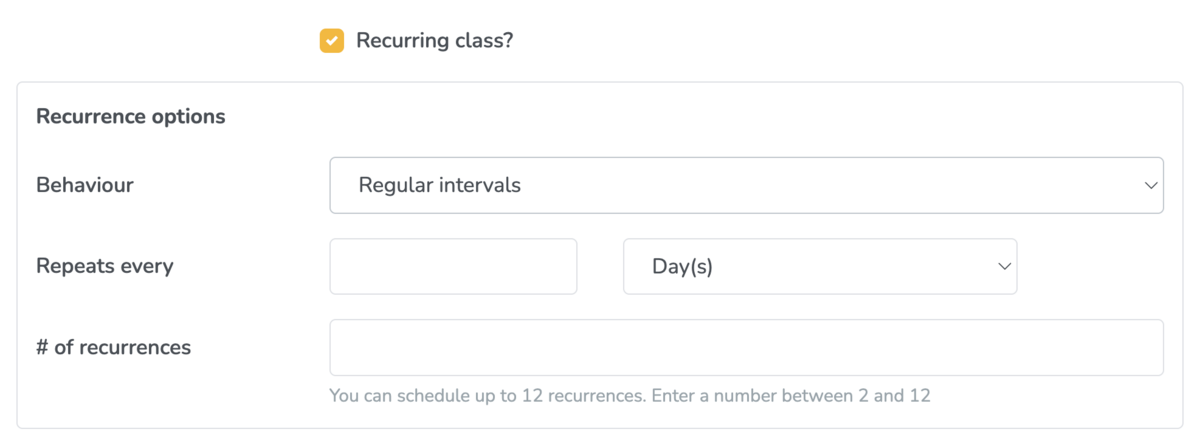
If a recurring class is selected, an additional feature will be displayed for the Registration behavior. You can then choose to allow patients to register for: - Individual classes only
- Individual or all classes
- All classes only
- Maximum participants count: sets the registration cap. Once this number is reached, the class will close to further bookings automatically.
- Show the number of registrants on the class page: enables patients to see current enrolment numbers, which can help create a sense of urgency or social proof.
- Published: only published classes are visible to patients on the booking portal. Leave unchecked to save as a draft until the class is ready to go live.
Additional settings after scheduling
Once a class has been created, two additional settings become available from the class page:
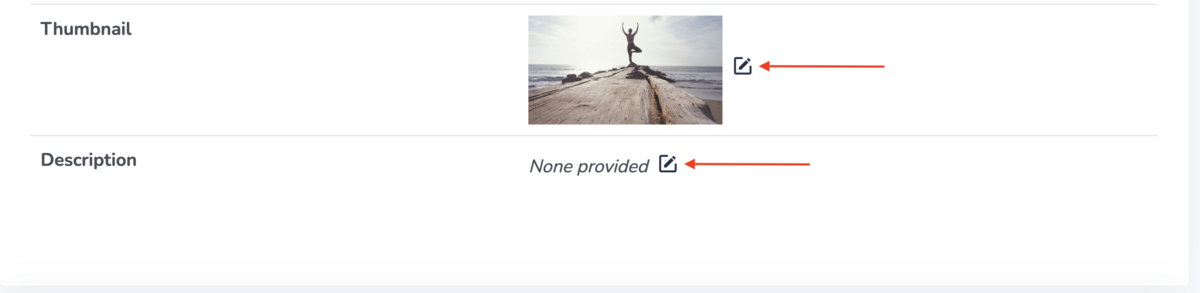
Thumbnail
Upload an image to represent the class on the booking portal card. A clear, relevant image improves the visual presentation of your class listing and helps patients quickly identify what is on offer.
You can also set a default class thumbnail image
Description
Add a description that will appear on the full class page. Use this space to outline what the class covers, who it is suitable for, and what patients can expect — this is your primary tool for encouraging registration.
You can also add patients to the class. At the bottom of the class page, click 'Manage participants':
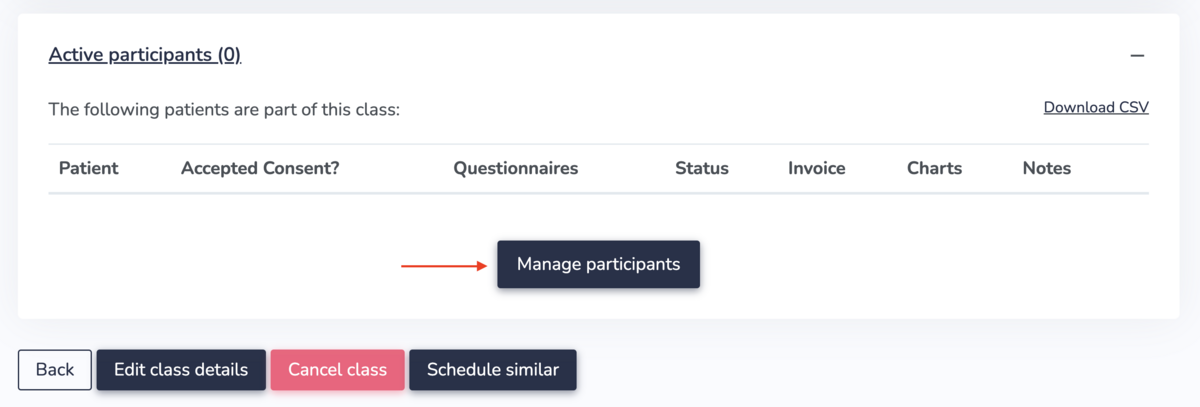
Depending on your online booking settings for the service used for this class, patients may be able to book themselves into the class. Learn more about the patient experience scheduling a class in the guide, How patients book and join classes.