
Using patient properties
Setting up patient properties requires Manager permission on your clinic. Practitioners and clinic admins can fill in and edit property values for individual patients.
Why use patient properties
Patient properties let you store the details that rarely change but come up often: DOB, phone numbers, the referring physician, emergency contacts, referral source, and more. Set them up once in Embodia and they appear where you need them, in the calendar, the chart, invoices, and patient search.
This guide covers how to create patient properties, choose where they’re displayed, and fill them in or edit them for individual patients.
Video tutorial
Please note: This video was recorded before several additions to the patient property feature, including more permission and visibility options and the ability to edit properties from within the chart. The feature itself works the same way, so use the video as a visual overview and refer to the sections below for the full details.
Add and manage patient properties
To add or manage your patient properties, select Settings in the top navigation bar, then Patient properties under My clinic. To add a new one, select Add a property, enter a name, and choose a question type from the drop-down menu. You can also choose where the property is displayed, and you can change this at any time.
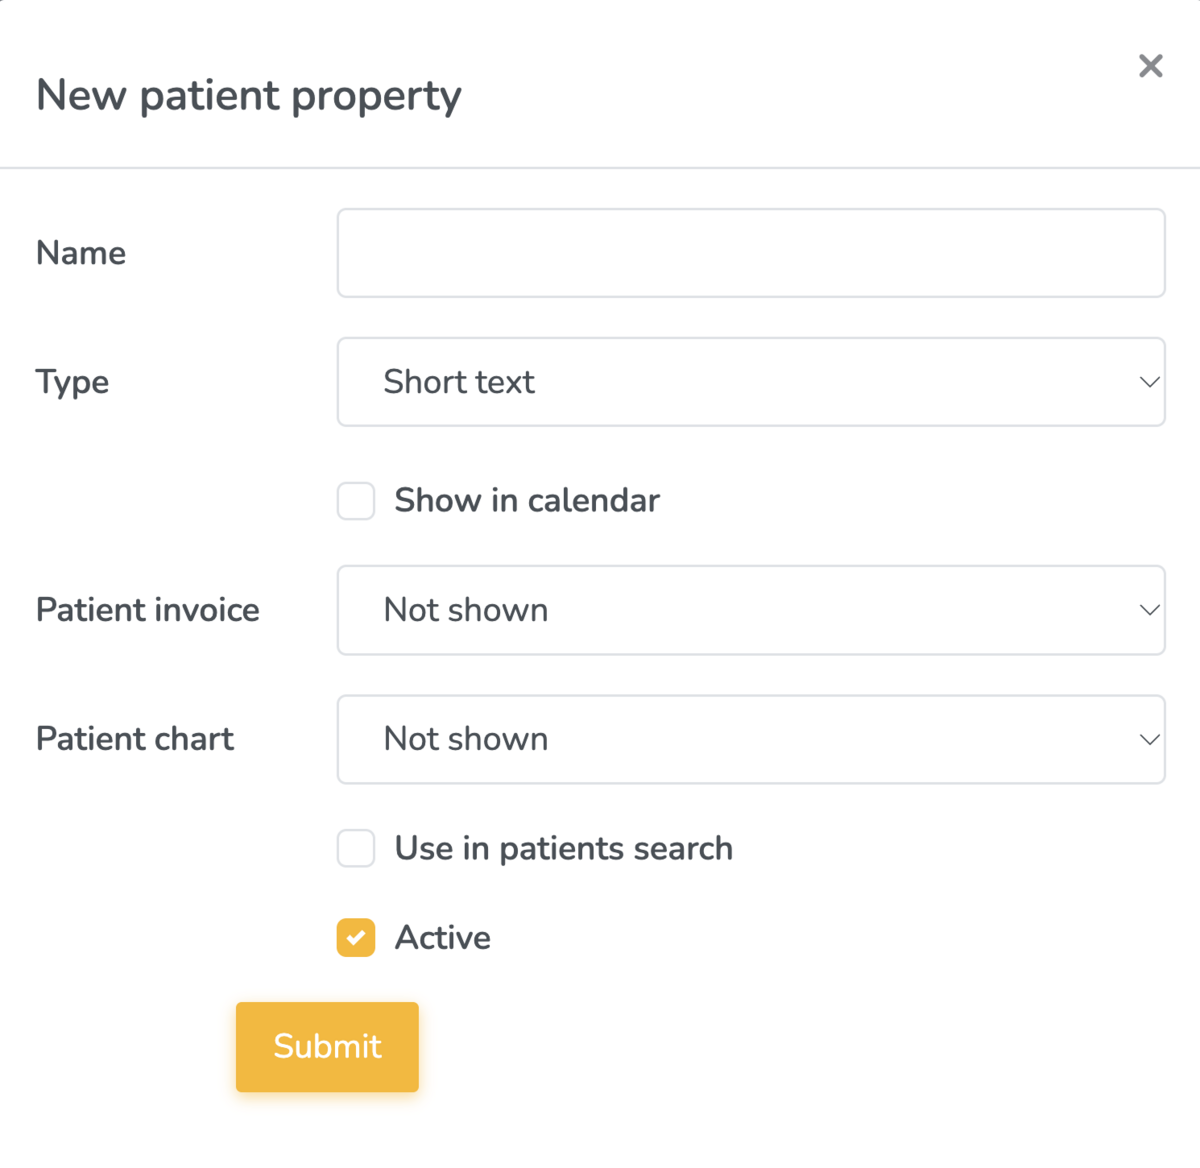
Question types
You can select from the following question types:
| Question type | Examples of what this property type can be used for |
| Address | Patient address |
| Birth date | Patient date of birth |
| Date | Any other important dates that are not a DOB |
| Date with distance to today summary | Lets you track how long ago an injury (or other event) happened |
| Drop-down* | Name of the person who referred the patient |
| Due date | Patient due date |
| Multi-line text | General notes about the patient, e.g., hobbies, recent vacation |
| Number | Any number that is not a phone number, e.g., number of children |
| Phone number | Any phone number, e.g., patient phone number; emergency contact phone number |
| Radio button* | Patient gender; patient sex; |
| Short text | Emergency contact name |
*Reports can only be generated for patient properties of the types: drop-down and Radio button.
Question types that require additional information
Drop-down and radio button properties need answer options before they’re ready to use. Until you add them, the property appears in red in your list.
To finish setting it up, select the property’s name and follow the on-screen steps.

Select Add an option and add as many answers as you need. For a referral source question, that might be ‘Google/Search engine’, ‘Social media’, and ‘Friend/Family (word of mouth)’.

Choose where patient properties appear
For each patient property, you can choose to:
- Show in calendar
- Show in patient chart, visible to practitioners only or to patients as well if the chart entry is shared with them
- Show on patient invoices, visible to practitioners only or to patients as well
- Use in patient search
Two more settings control how the property works:
- Active: the property must be active before you can use it.
- Primary (phone number and address properties only): tells Embodia which number or address to send with insurance claims through TELUS eClaims and Office Ally. Patients can have several phone numbers or addresses on file, such as their own and an emergency contact’s, so this makes sure the right one is used.
Here's what each display option looks like.
Show in calendar
When Show in calendar is on, select any booking in your calendar to see the property in the patient tab.
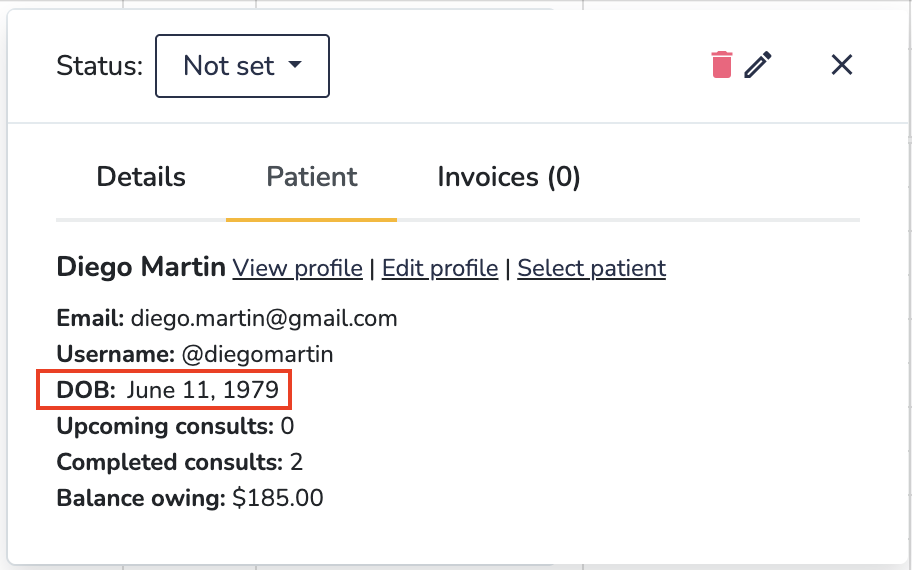
Show in patient chart
There are two visibility options when you choose to display a patient property in the patient chart:
- Shown to both patients and practitioners
- Only shown to practitioners
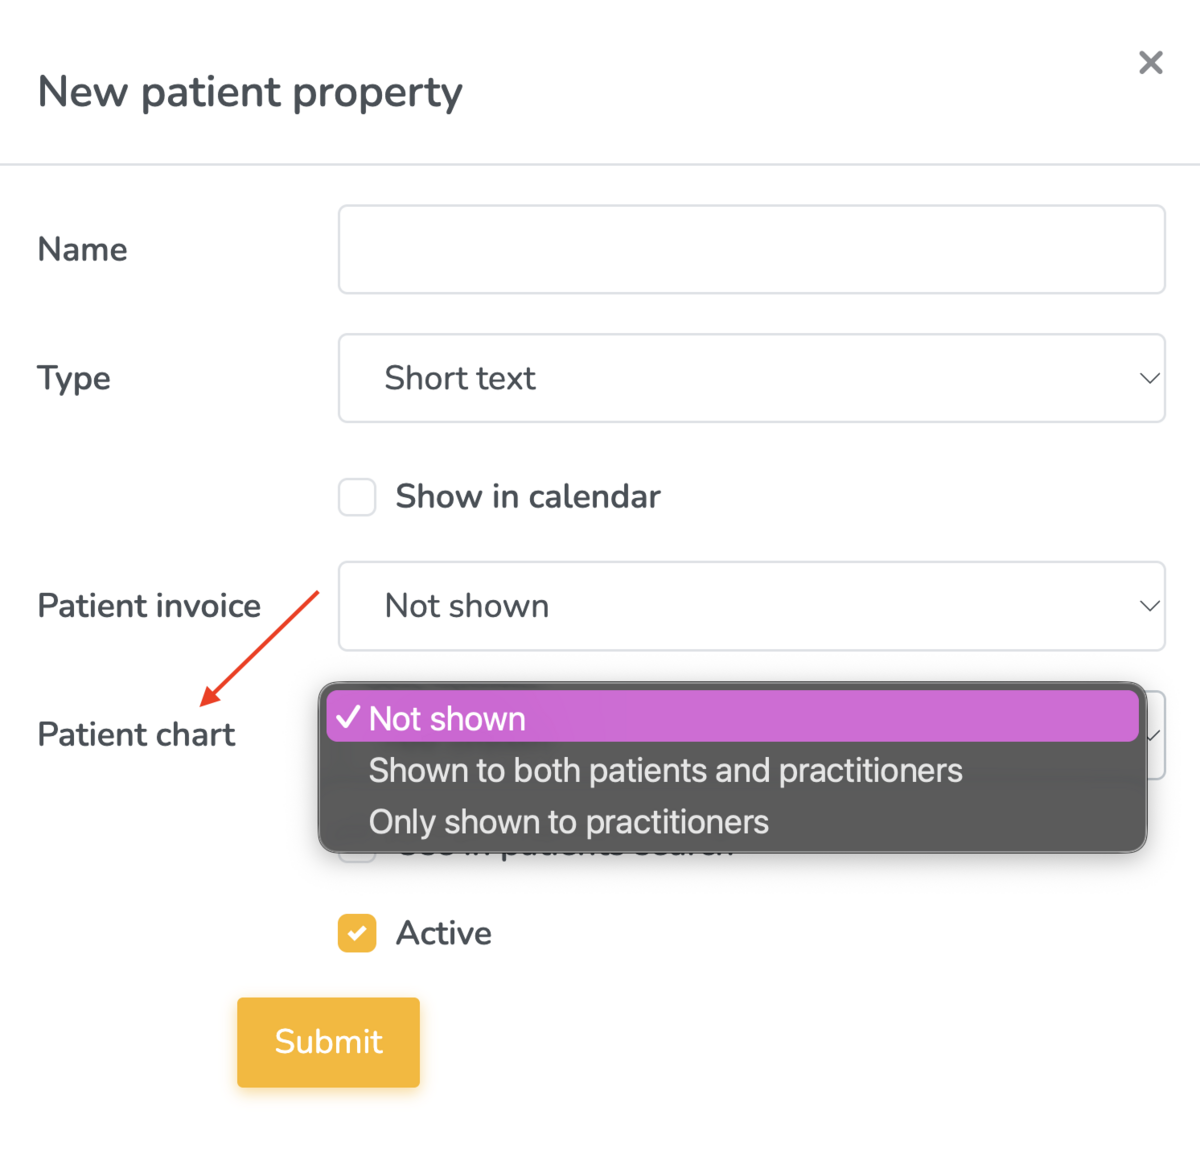
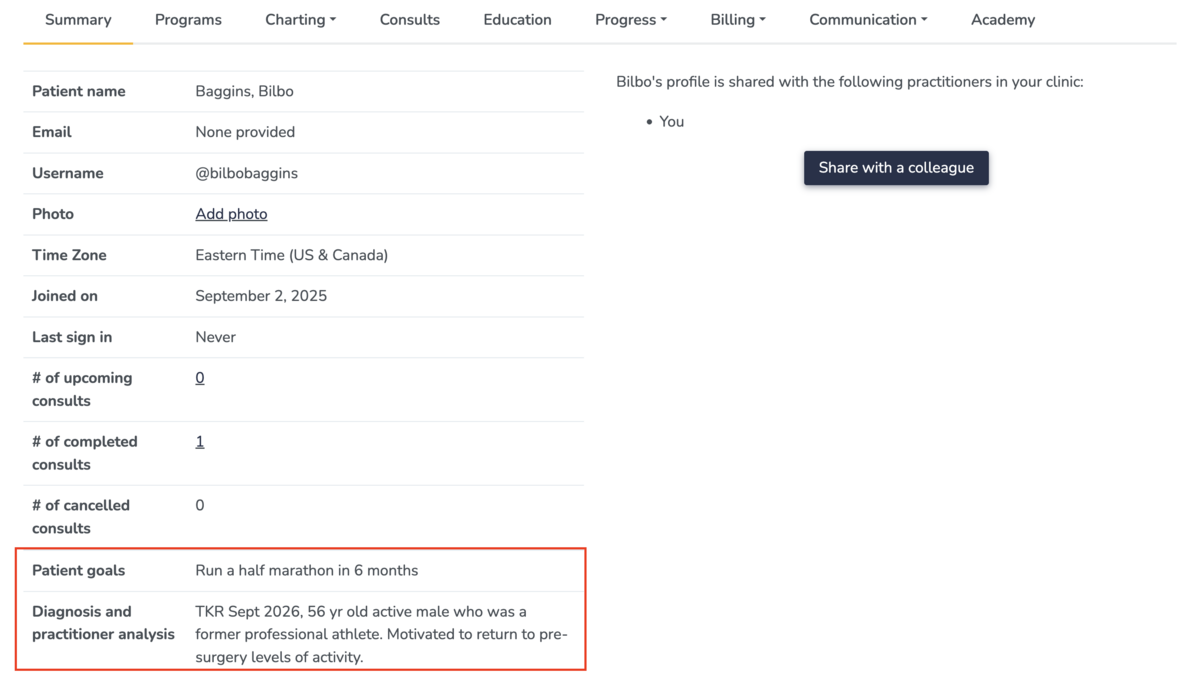
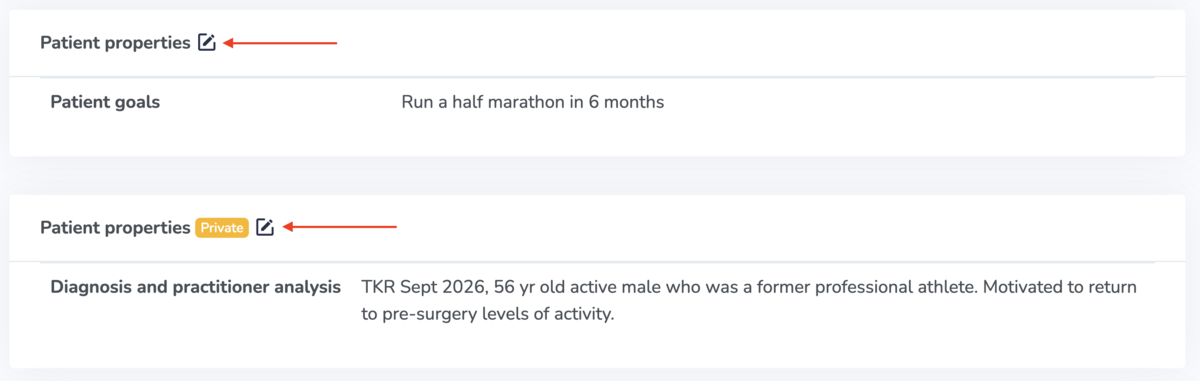
Properties appear at the top of the chart, below the info section. Practitioner-only properties have a Private badge next to the Patient properties heading.
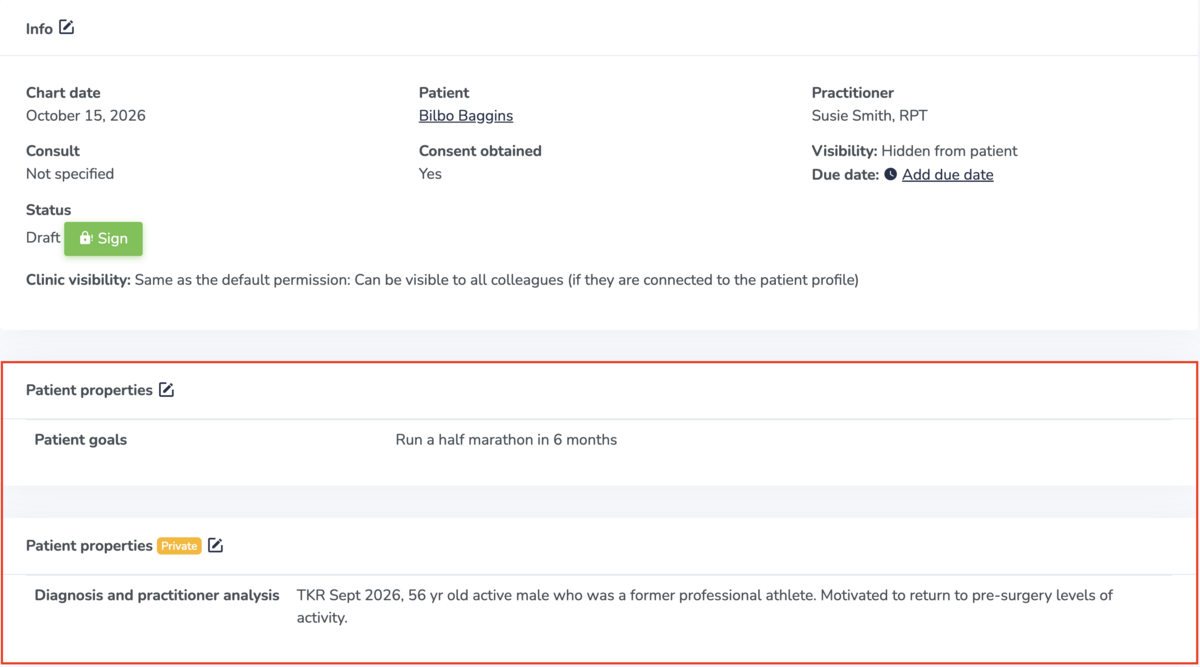
Patient properties can be edited directly in the chart. This is covered in the section 'Filling in and editing patient properties' in this guide.
Properties set to show in the chart also appear on the patient’s Summary tab.
Show on patient invoices
There are two visibility options when you choose to display a patient property on invoices:
- Shown to both patients and practitioners
- Only shown to practitioners
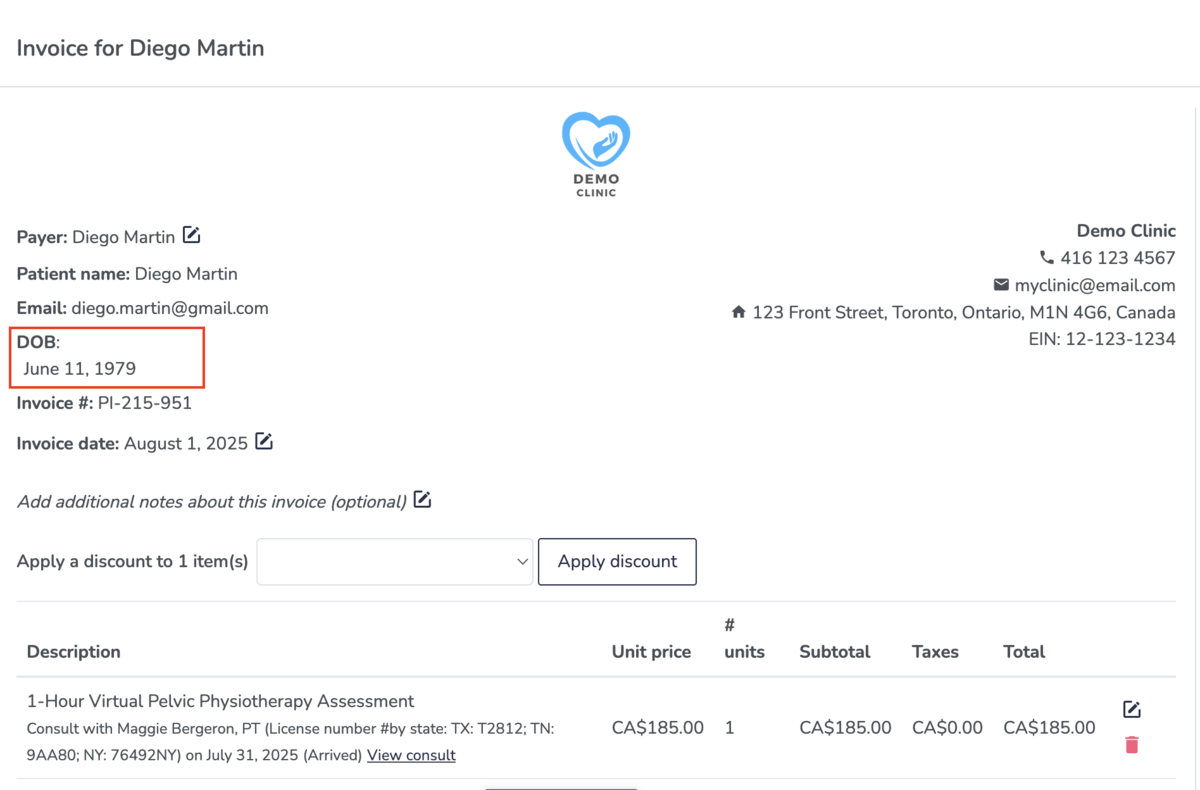
The property appears at the top of the invoice.
Be used in patient search
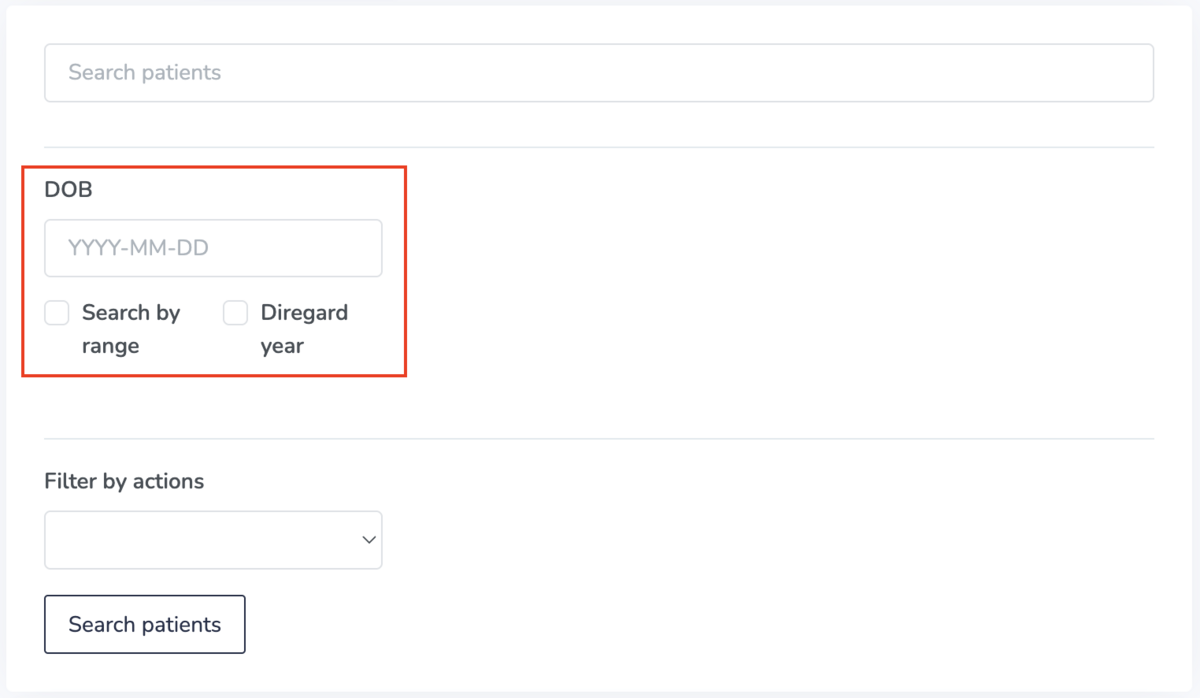
When you select for a patient property to be used in patient search, a search box for this property will be added to your My patients menu, allowing you and your team to filter for patients using this property.
Filling in and editing patient properties
Once your properties are set up, your team can fill them in, or patients can complete them on their own.
From the patient profile
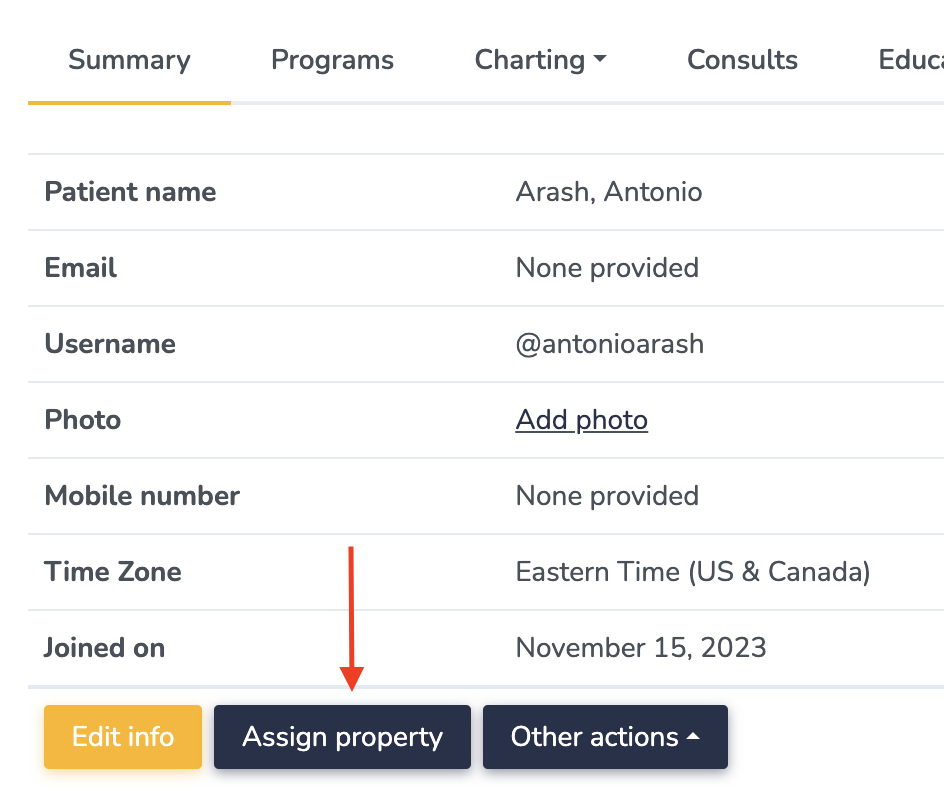
- Go to the patient’s profile and open the Summary tab.
- Select Assign property. All patient properties appear, whether they’re filled in or not.
- Complete or edit any property, then select Submit.
From the chart
- In the patient’s chart, select the Edit icon next to Patient properties.
- Edit any of the properties shown, then select Submit.
Only properties set to show in the patient chart appear here. To edit any others, use the Summary tab.
Patients filling in patient properties
Patients can complete properties themselves in two ways:
- Through a questionnaire: when a property is connected to a questionnaire, the patient’s answer is saved to their profile automatically. Learn how to connect the patient property to a questionnaire.
- Through online booking: if online booking is enabled, you can include properties on the sign-up form and in online booking requests. Learn more in online booking settings.